How to create a VM
Before starting to create a VM, check you have inserted your SSH public key in Access & Security. If the public key is not present, follow this guide to add it.
Log in to the ReCaS web dashboard with your username and password, and, from the upper menu, select the tenant in which you want to create a virtual machine (VM).

In the left panel, click Project (1), then Instances (2) and then the Launch Instance button (3) in the upper right part of the page, as shown.

In the new window, configure the VM:
-
in the
Detailstab, in Instance Name type a name for the VM; in Availability Zone select "nova"; in Count set 1 (or higher values if you want to create more VMs);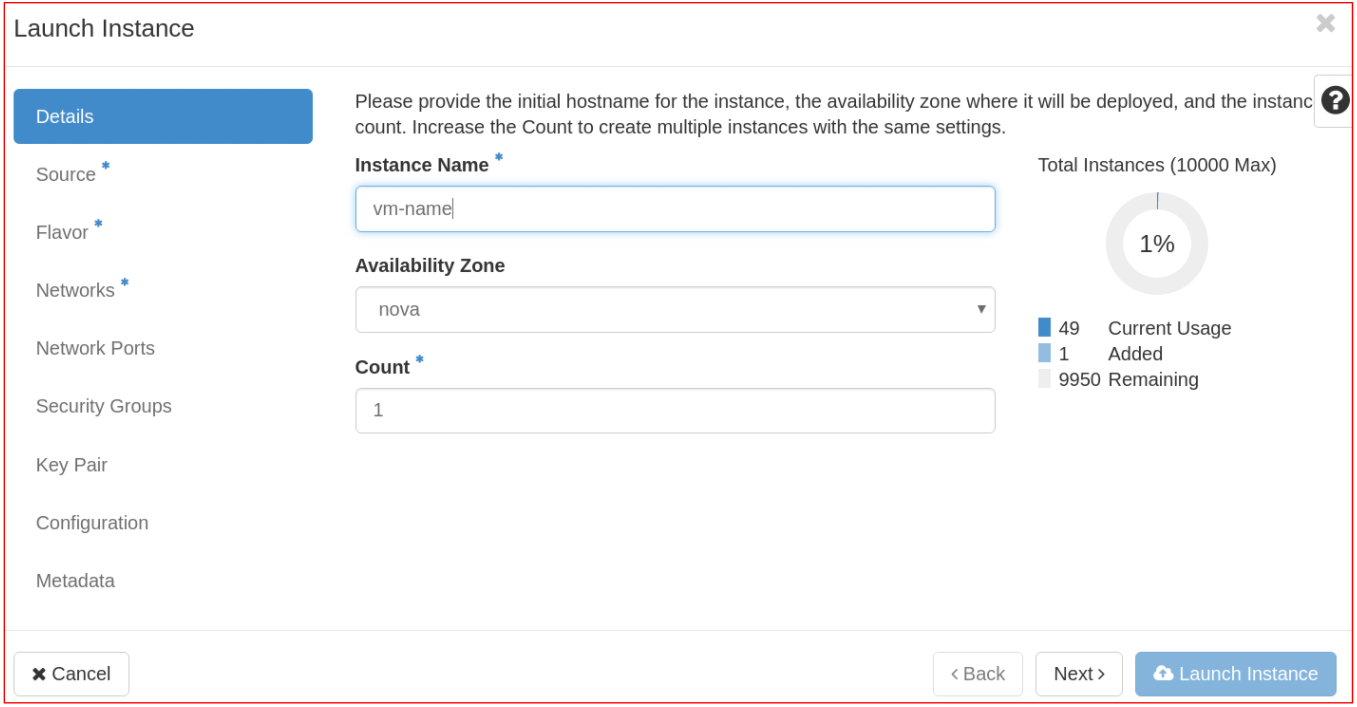
-
in the
Sourcetab, select "Image" in Select Boot Source (1); from the Available menu, add the image for your VM (2) (in the example in the figure, Ubuntu 16.04);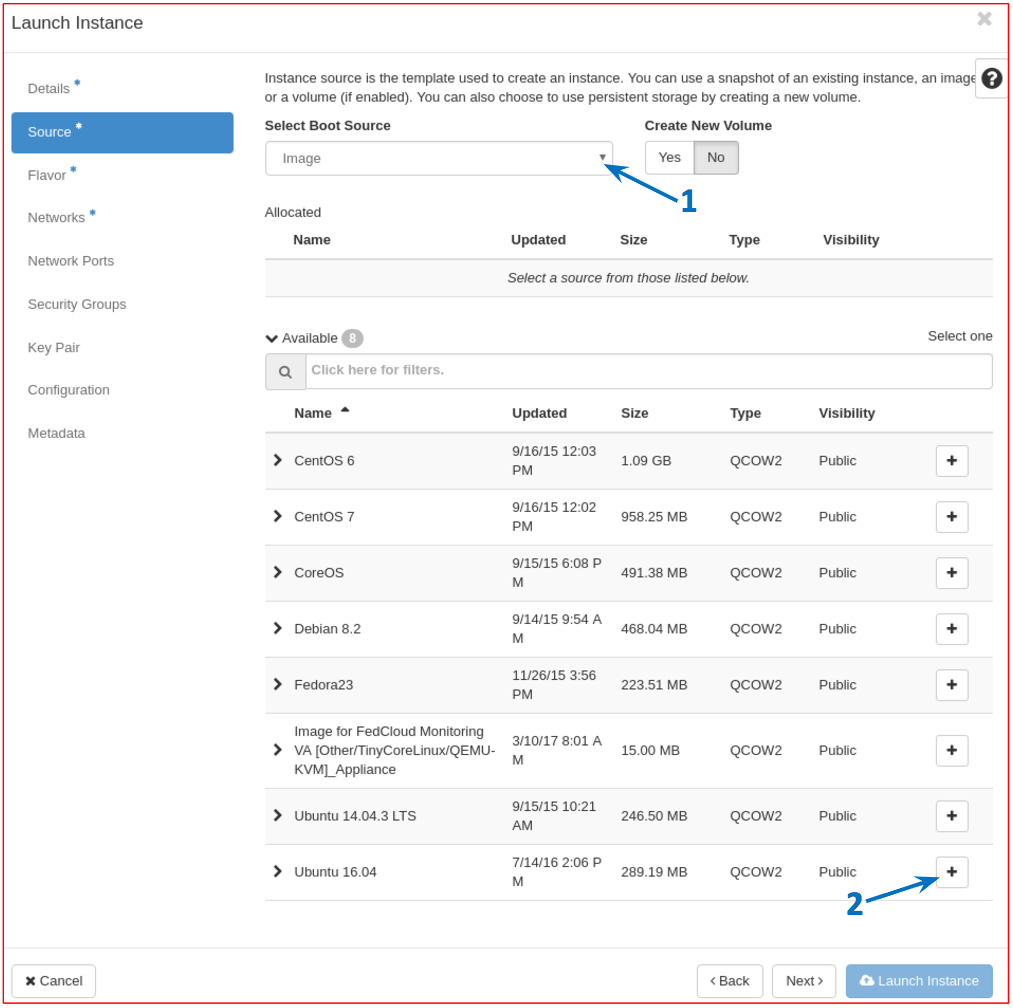
-
in the
Flavortab, select the flavor you need for the VM from the Available menu (in the example in the figure, tha flavor "small" is added);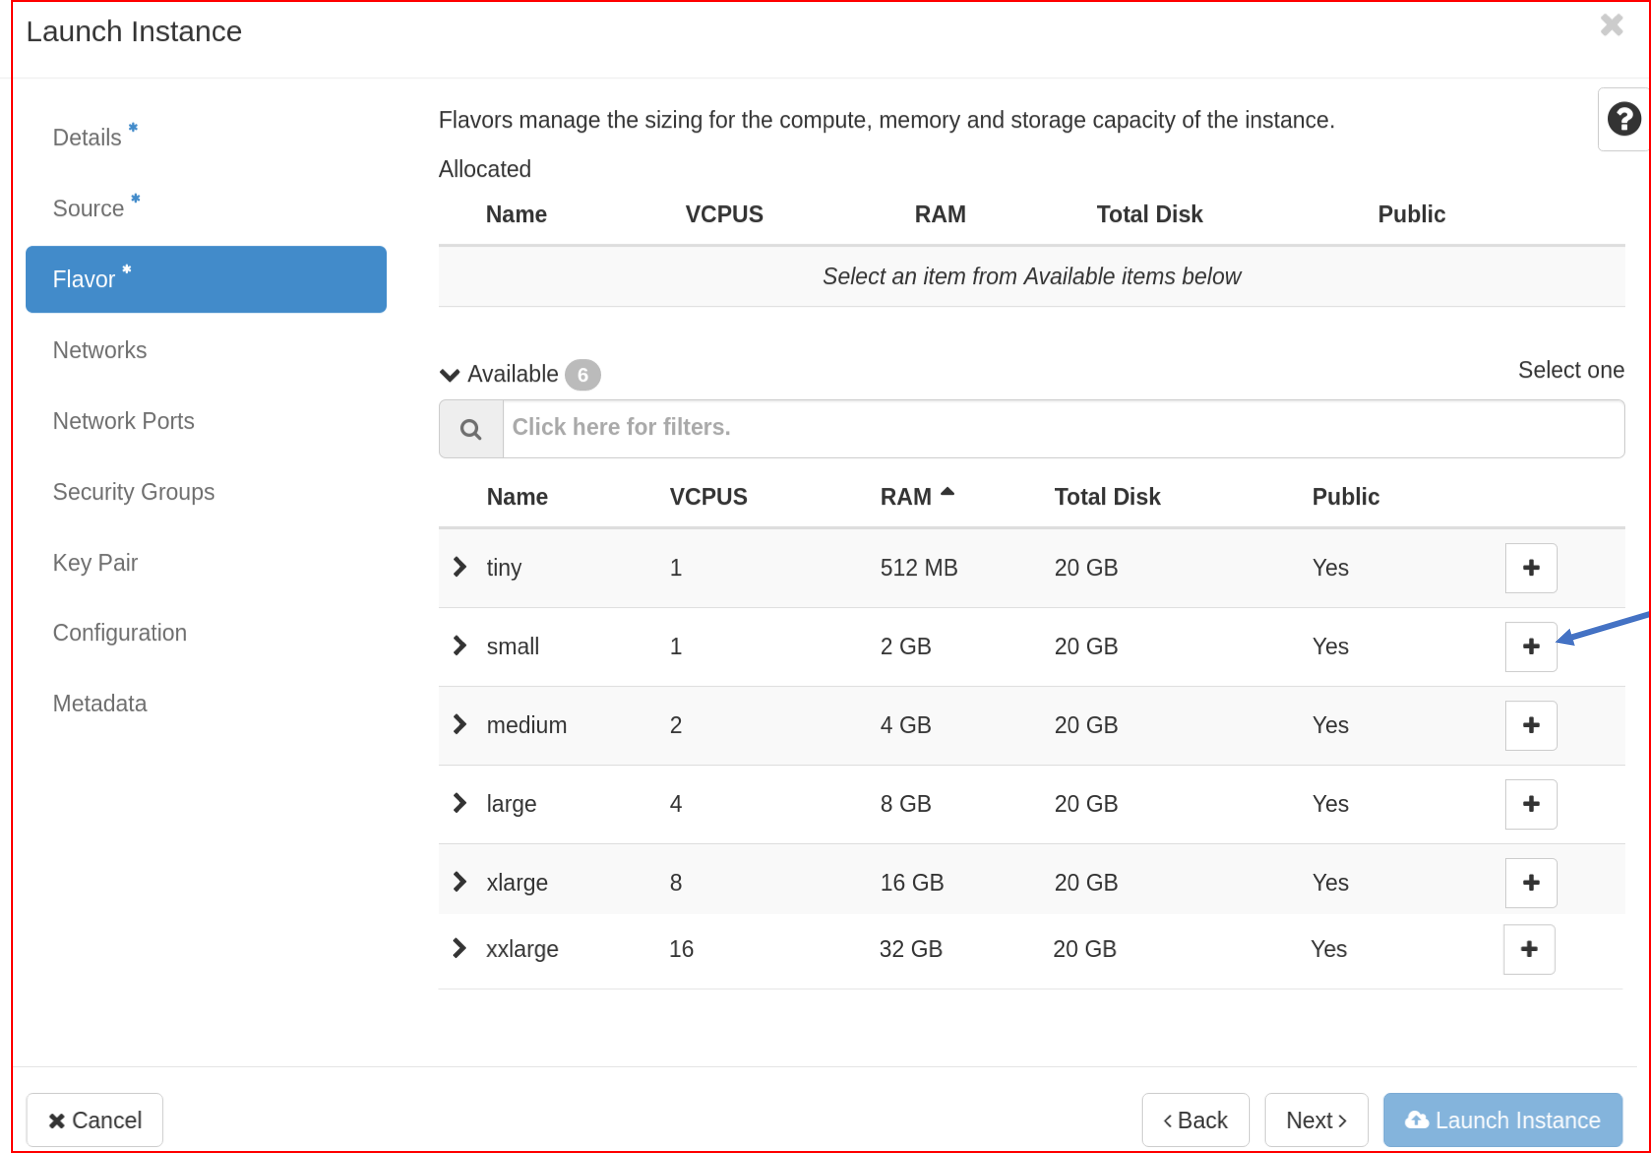
-
in the
Networkstab, select the network (public or private) for the VM. Please use public_net only if really necessary, e.g. if your VM will host a public webserver; private_net, instead, guarantees higher security for the VM. To access a VM with private IP, you need to start a VPN connection.
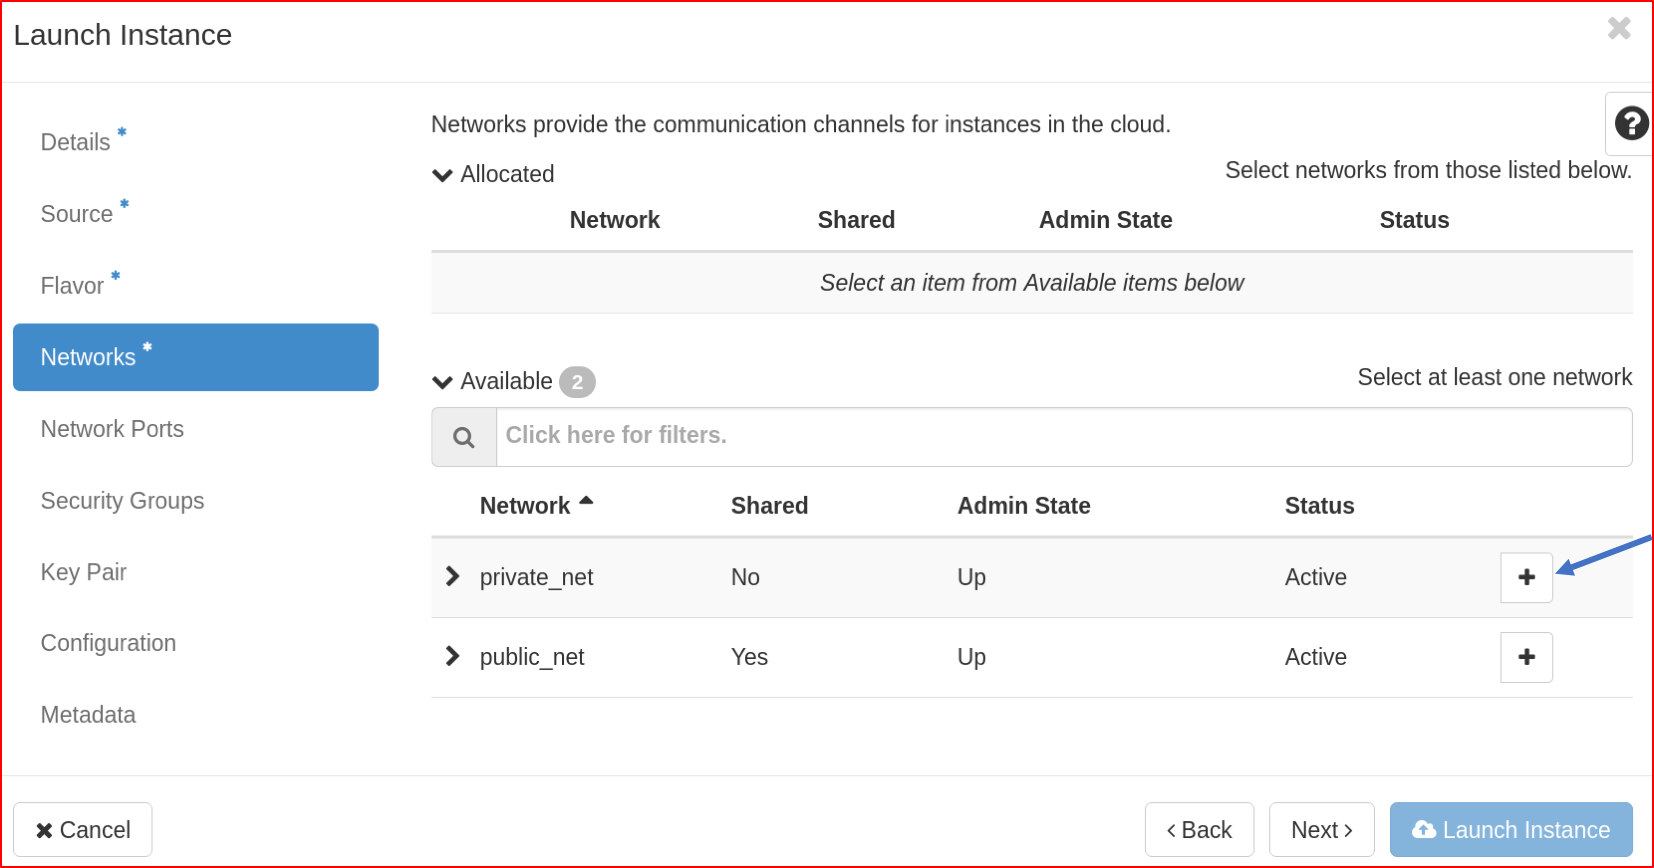
If you need two interfaces (public and private), remind to first insert the public one and then the private one. Notice that usually the system only configures the first interface with DHCP, while the second one has to be manually configured. In this case, after creating the VM, log in to the VM from a terminal as root and configure the network as shown here;
-
in the
Security Groupstab, select from the Available menu the security groups you need for your VM (in the example in the figure, ssh security group is added).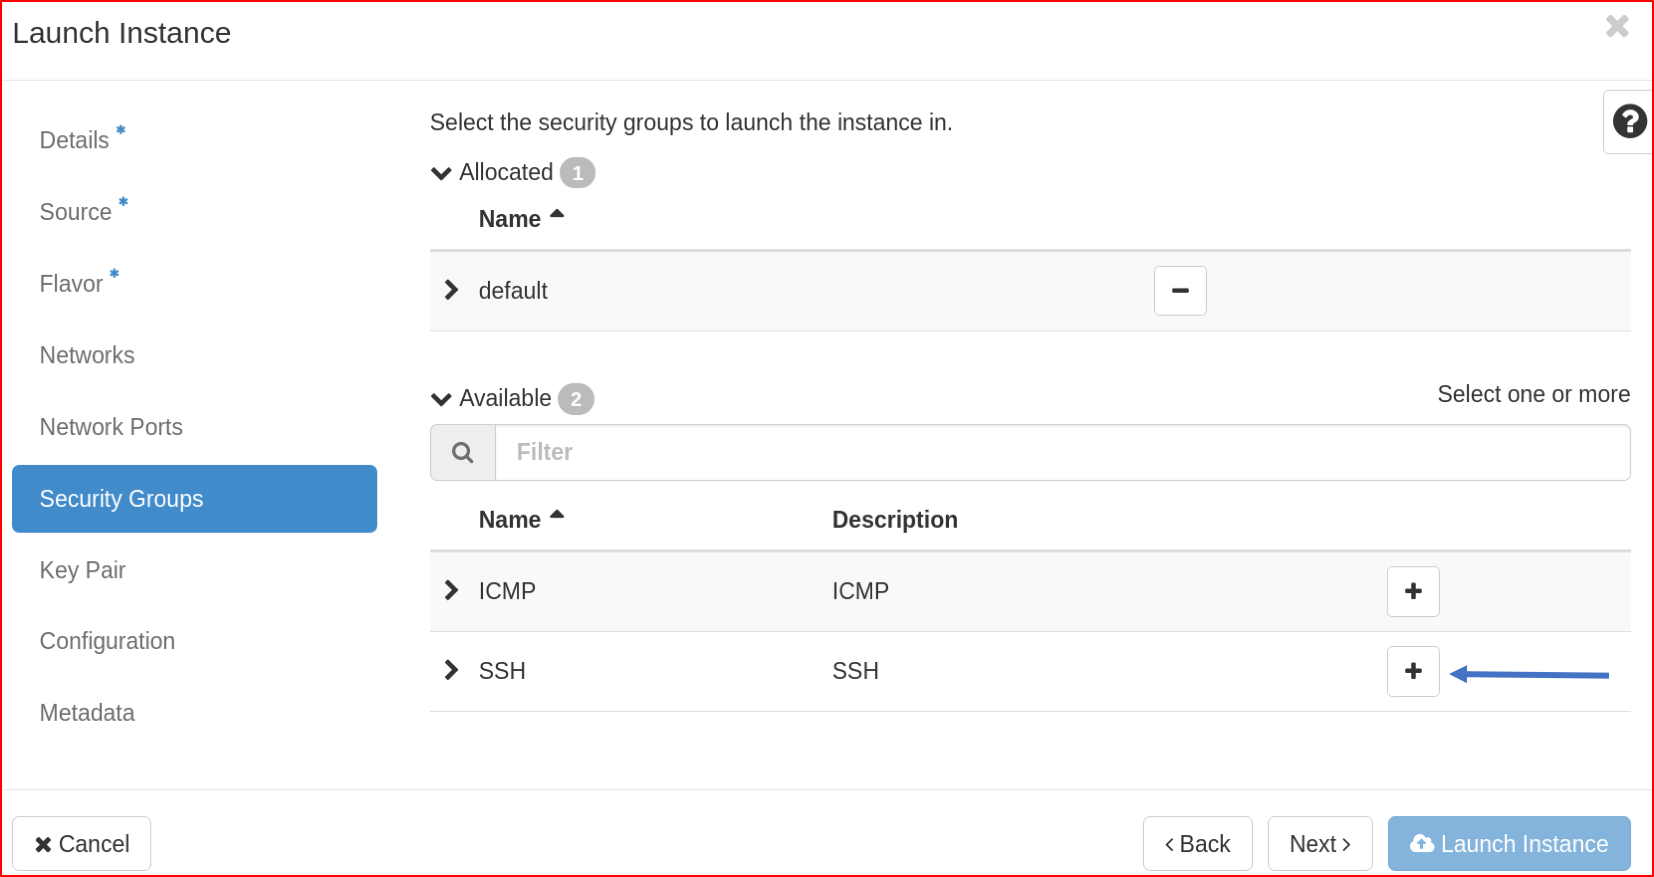
However, if you have not already created your Security Groups, at the end of this procedure, follow these instructions to create the Security Groups and add them to the VM;
-
in the
Key Pairtab, select your key from the Available menu; -
the tabs
Network Ports,ConfigurationandMetadataare for advanced settings, which are outside the purposes of this guide.
Once the desired configuration has been chosen, click the Launch instance button to create the VM. Please remind that VMs cannot be accessed unless you create and add to the VM proper Security Groups, as shown at this page.
How to configure two network interfaces
If you have inserted two network interfaces (public and private) on your VM, in order to have a stable system you have to configure the private interface with static IP and the public one with DHCP, as shown in the following. Check the name of the two interfaces by executing on your VM the command
ifconfig -a.
- On Debian based distributions (Debian, Ubuntu), assuming that ens3 is the public interface and ens4 the private one, look for the
.cfgfile in folder/etc/network/interfaces.d, and modify it such that its final content is:auto lo iface lo inet loopback auto ens3 iface ens3 inet dhcp auto ens4 iface ens4 inet static address <PRIVATE-IP> netmask 255.255.255.0
replacing<PRIVATE-IP>with the private IP address of the VM. Notice that you could find two.cfgfiles, one for the public interface and the other for the private one. - On Red Hat based distributions (Fedora, CentOS, Scientific Linux), assuming that eth0 is the public interface, check that the file
/etc/sysconfig/network-scripts/ifcfg-eth0has the following content:DEVICE="eth0" BOOTPROTO="dhcp" ONBOOT="yes" TYPE="Ethernet" USERCTL="yes"
To configure the private net (assuming that eth1 is the private interface) create the file/etc/sysconfig/network-scripts/ifcfg-eth1with the following content:DEVICE="eth1" BOOTPROTO="static" ONBOOT="yes" TYPE="Ethernet" USERCTL="yes" IPADDR=<PRIVATE-IP> NETMASK=255.255.255.0
replacing<PRIVATE-IP>with the private IP of the VM.
Then, reboot the VM by typing reboot on terminal. Notice that you have to implement these instructions ONLY when two network interfaces are present, while if there is only one interface (public or private), keep the default configuration (DHCP).