How to configure access rules through Security Groups
Security Groups allow the user to modify access rules to a virtual machine. The user can easly decide which ports to open (in ingress or egress) and from/to which IPs or subnets.
To manage security groups, log in to the ReCaS web dashboard with your username and password. In the left panel, click Project (1), then Access & Security (2), and then the Security Groups tab (3), where a list of the Security Groups already set in the tenant is present.

To create a new Security Group, click Create Security Group in the upper right part of the page.
In the new window, type a name and a description for the security group and then click Create Security Group to create it.
To manage a Security Group (add or remove rules), click Manage Rules.
In the new window, the list of the rules for that security group will appear. To add new rules click Add Rule and configure the rule you need (see the examples).
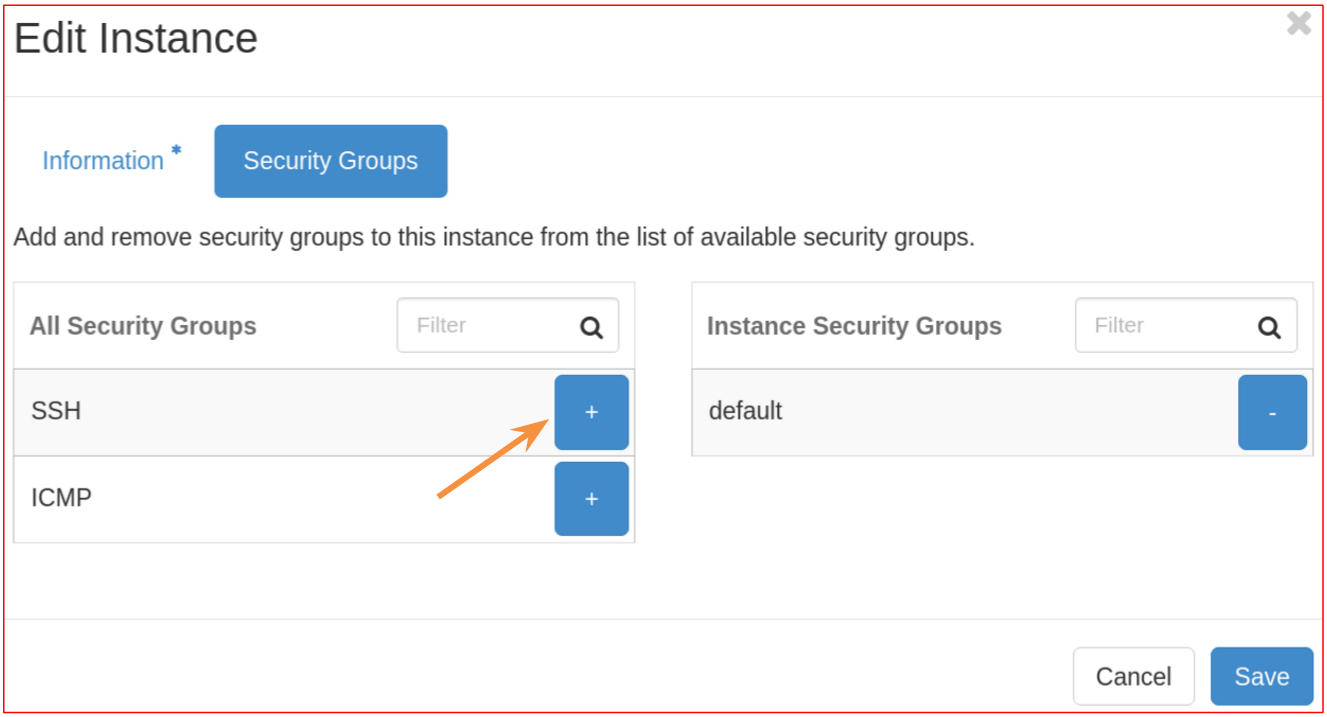
Finally, you have to add the new security group to your VM. On the left panel, click Instances (1), then click on the right menu of your instance (2) and select Edit Security Groups (3).

In the new window, you can add or remove Security Groups from your VM.

Examples
In the following, some examples will be shown on how to configure specific rules.
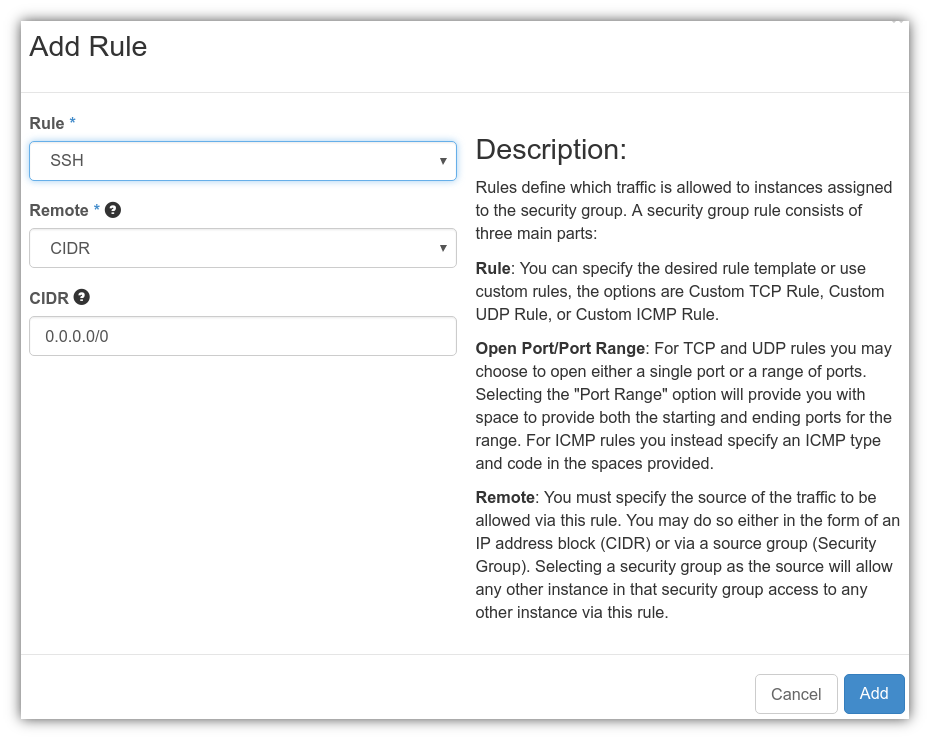
- Example 1: Add SSH rule (analogously for HTTP, HTTPS...)
After clicking
Add Rule, in the new window select "SSH" from the Rule menu; in the menu Remote you can choose "CIDR" or "Security Group" as source of traffic: if you choose "CIDR", in the menu CIDR indicate the network which you want to SSH the VM from (ex.: 90.147.66.0/24), or leave 0.0.0.0/0 if you want the port to be open to traffic coming from anywhere; if you choose "Security Group", in the menu Security Group indicate the security group such that any other instance in that security group can access to any other instance via this rule, and in the menu Ether Type select "IPv4".
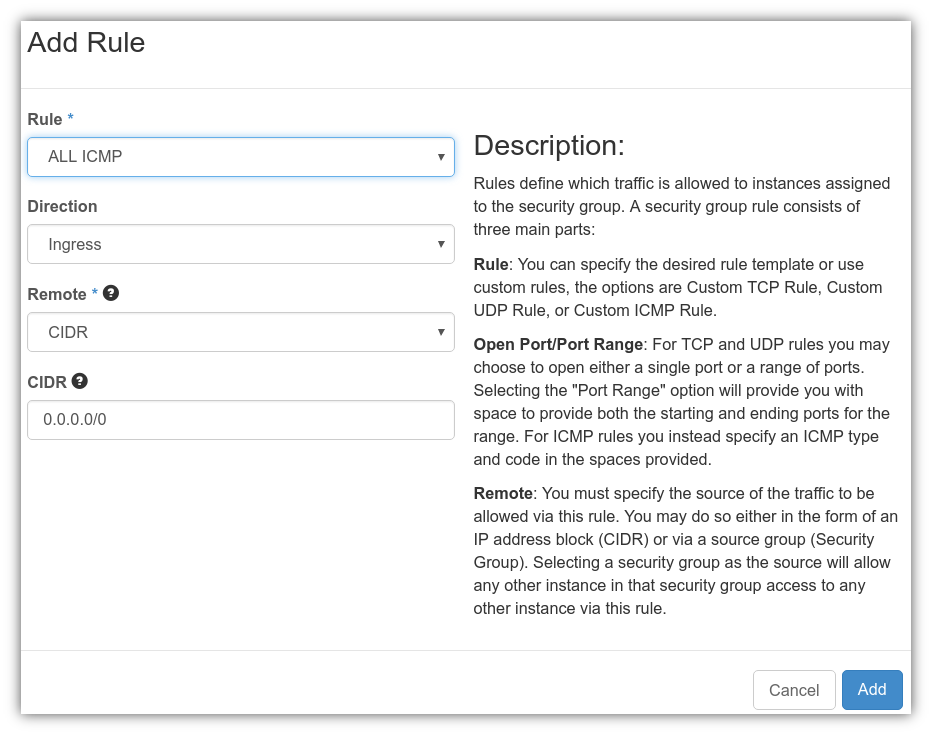
- Example 2: Add ALL ICMP rule to allow pinging
After clicking
Add Rule, in the new window select "ALL ICMP" from the Rule menu; in the menu Direction you can choose "Ingress" or "Egress"; the other options are as in the previous example.
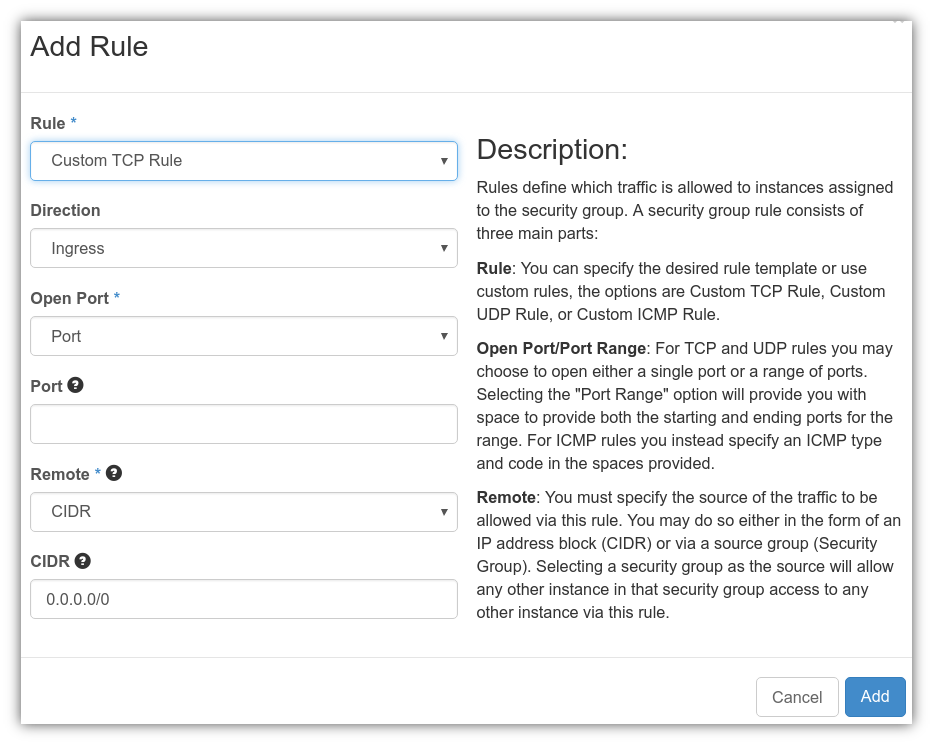
- Example 3: Add a TCP rule
After clicking
Add Rule, in the new window select "Custom TCP Rule" from the Rule menu; in the menu Direction you can choose "Ingress" or "Egress"; in the Open Port menu you can choose Port or Port Range, and, according to this choice in next menu type the port number (or the port range) you want to open; the other options are as in the first example.For example, if you need to access port 13389 with TCP protocol (as needed to access a Windows VM), in the Open Port menu choose "Port" and type 13389 in the Port field.